
1. Isingeniso
The Waveshare ESP32-P4 POE ETH Development Board is a multimedia development board based on the ESP32-P4 chip. It integrates a dual-core RISC-V processor and supports up to 32MB PSRAM, featuring USB 2.0, MIPI-CSI / DSI, H.264 encoder, and various other peripherals. This board is designed for low-cost, high-performance, and low-power multimedia development, offering rich Human-Machine interfaces and robust security features.
Izici Eziyinhloko:
- High-performance MCU with RISC-V 32-bit dual-core and single-core processors.
- Integrated 128 KB HP ROM, 16 KB LP ROM, 768 KB HP L2MEM, 32 KB LP S-RAM, 8 KB TCM.
- Onboard 32MB PSRAM and 32MB Nor Flash for ample memory.
- Powerful image and voice processing capabilities, including JPEG codecs, Pixel Processing Accelerator (PPA), Image Signal Processor (ISP), and H.264 video encoder.
- Rich interfaces: MIPI-CSI, MIPI-DSI, USB 2.0 OTG, 100M RJ45 Ethernet port, SDIO 3.0 TF card slot, microphone, and speaker header.
- Adapting 2*20 GPIO headers with 27 remaining programmable GPIOs, compatible with some Raspberry Pi Pico HATs.
- Security features: Secure Boot, Flash Encryption, cryptographic accelerators, TRNG, and hardware access protection mechanisms.
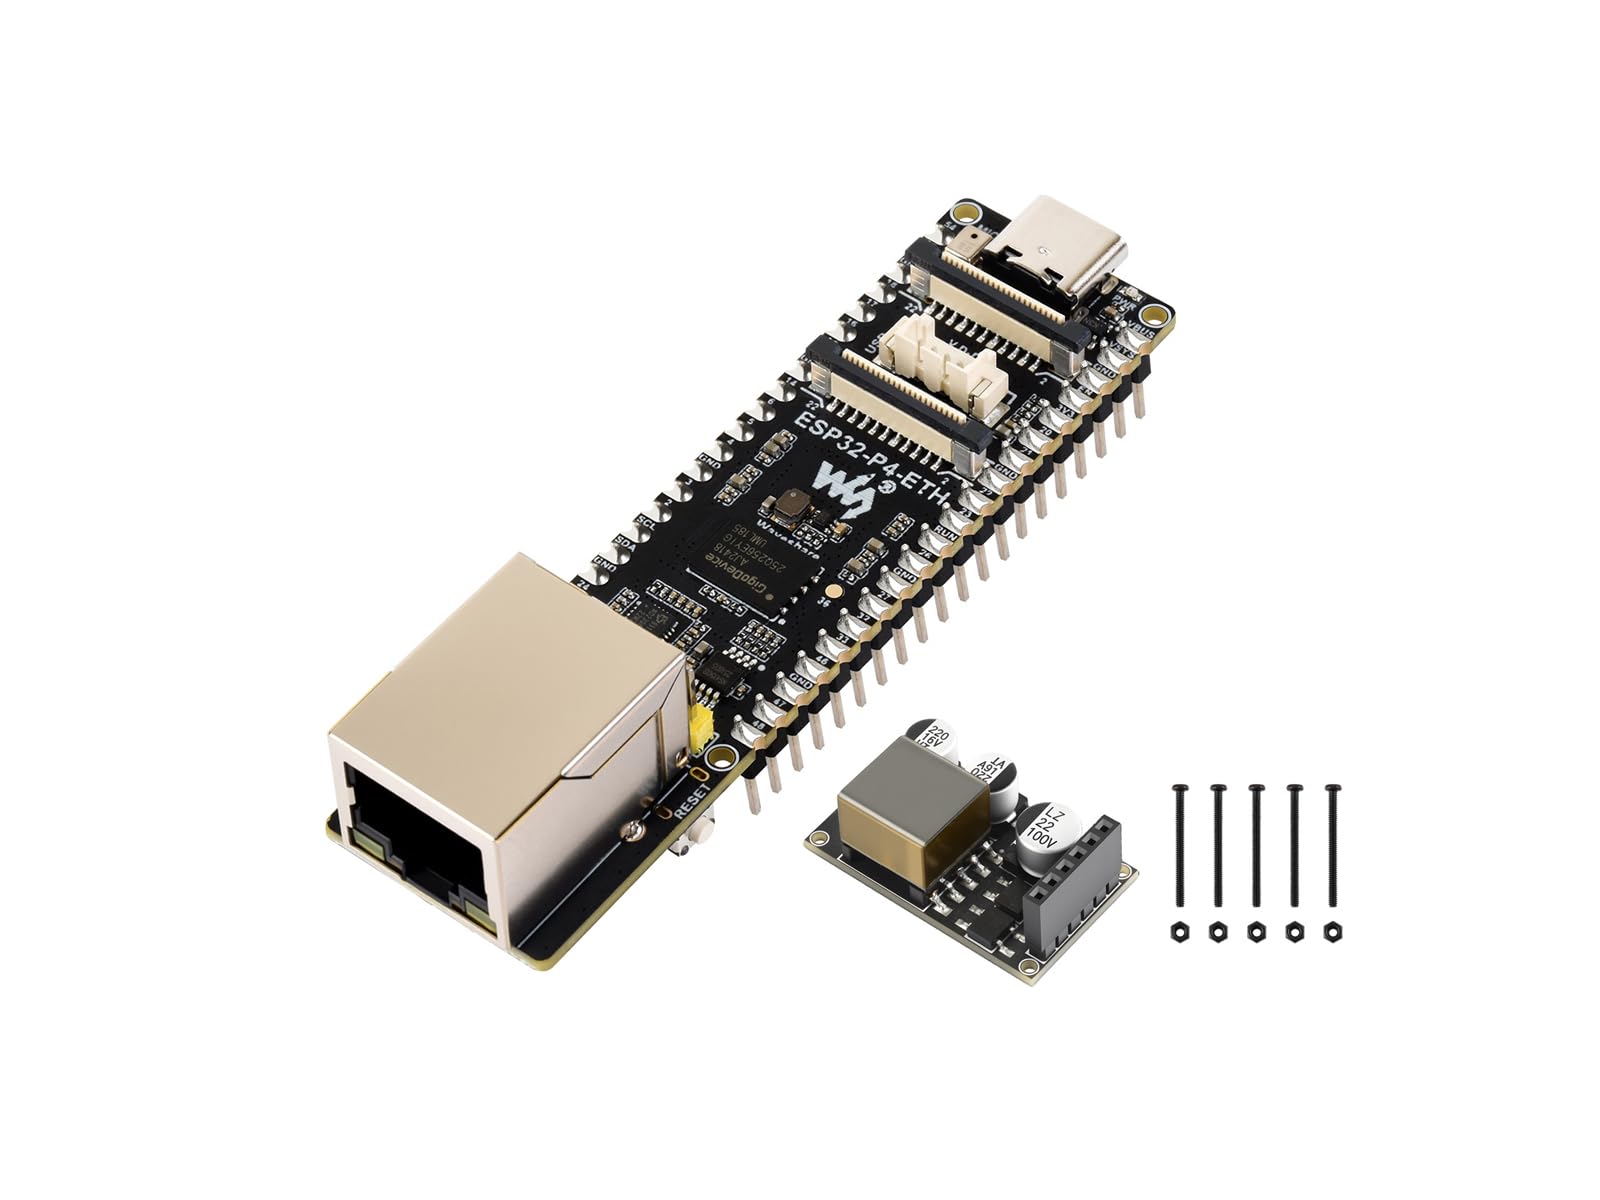
Image 1.1: The ESP32-P4 POE ETH Development Board showcasing its high-performance features and rich human-machine interfaces.
2. Okuqukethwe Kwephakheji
Qinisekisa ukuthi zonke izinto ezibalwe ngezansi zifakiwe kuphakheji yakho:
- ESP32-P4-ETH-M Development Board × 1
- PoE module × 1
- Screws pack × 1
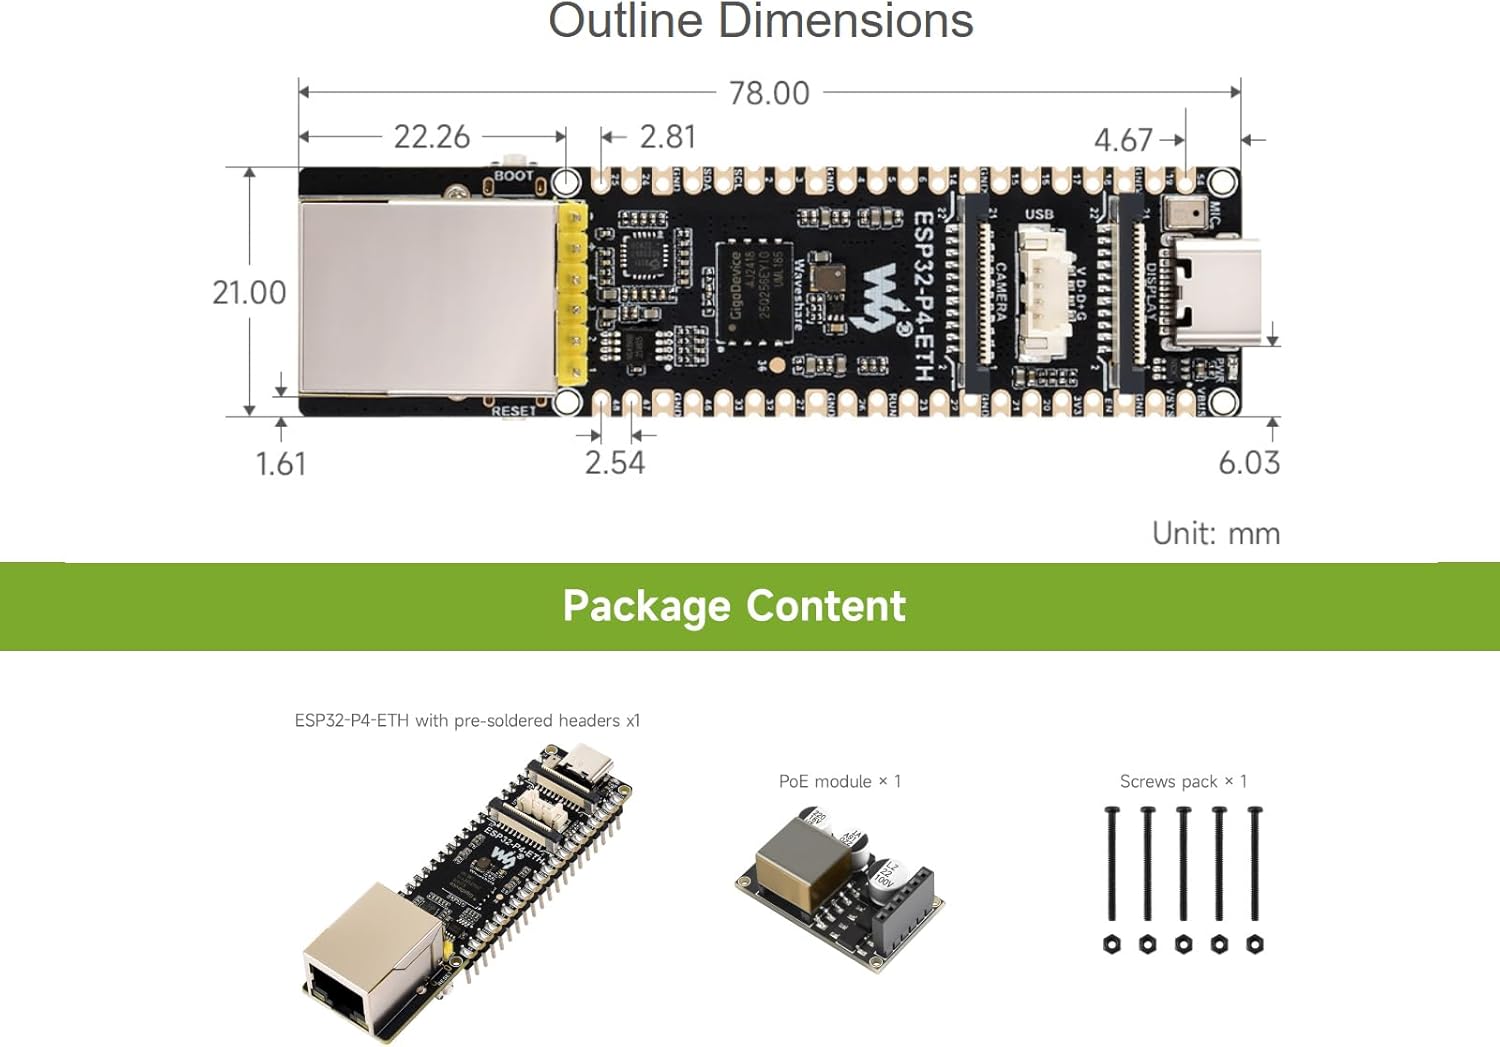
Image 2.1: The ESP32-P4-ETH-M development board, PoE module, and screw pack as included in the package. The image also shows the outline dimensions of the board.
3. Umkhiqizo Uphelileview and Board Layout
The ESP32-P4-POE-ETH board is designed with a compact form factor, integrating essential components for various applications. Understanding the layout is crucial for proper setup and operation.

Isithombe 3.1: Phezulu naphansi views of the ESP32-P4 development board, highlighting the ESP32-P4 module and onboard 32MB Nor Flash.

Image 3.2: Detailed diagram showing the components and pin definitions of the ESP32-P4-ETH board. Key components include the ESP32-P4NW32 chip, 100M RJ45 Ethernet port, 32MB Nor Flash, Display Interface (MIPI-DSI), Camera Interface (MIPI-CSI), Type-C port, Speaker header, 4PIN USB header, PoE module & power supply header, BOOT button, RESET button, Power indicator, and TF card slot.
4. Setha
4.1 Ukunikezwa kwamandla
The ESP32-P4-POE-ETH development board supports two primary power supply methods:
- I-USB Type-C: Connect a standard USB Type-C cable to the board's USB-C port and a power source (e.g., computer USB port, USB wall adapter). This port is also used for programming.
- Amandla phezu kwe-Ethernet (PoE): If using the included PoE module, connect it to the board and then connect an Ethernet cable from a PoE-enabled switch or injector to the board's RJ45 port. This allows both data and power to be supplied over a single Ethernet cable.

Image 4.1: Illustration of the two power supply methods: USB Type-C for direct power and data, and the PoE module for Power over Ethernet functionality.

Image 4.2: The PoE module connected to the development board, demonstrating how it integrates with PoE equipment (e.g., an 802.3af-compliant router or switch) to provide both network and power.
4.2 Ukuxhumana kokuqala
To begin development, connect the board to your computer via the USB Type-C port. Ensure the necessary drivers and development environment (e.g., ESP-IDF) are installed on your computer. Refer to the official Espressif documentation for detailed software setup instructions.
4.3 Ukuxhumana Kwangaphandle
Utilize the 2*20 GPIO headers to connect various peripherals. The board is compatible with some Raspberry Pi Pico HATs, expanding its application possibilities. Connect MIPI-CSI cameras, MIPI-DSI displays, speakers, microphones, and other sensors as required for your project.
5. Iziqondiso Zokusebenza
5.1 Programming and Firmware Upload
The ESP32-P4-POE-ETH board can be programmed using the ESP-IDF framework. Connect the board via USB-C, compile your code, and use the esptool.py utility or your IDE's integrated flashing tool to upload the firmware. Press the BHUKU button while resetting or powering on to enter download mode if required.
5.2 Ukuxhumana kwe-Ethernet
The onboard 100M RJ45 Ethernet port allows for stable wired network connectivity. Configure the Ethernet interface in your firmware to enable network communication, including TCP/IP, UDP, and other protocols.
5.3 Multimedia Interfaces
- MIPI-CSI: Connect compatible camera modules to the MIPI-CSI interface for image acquisition and processing.
- MIPI-DSI: Connect compatible display panels to the MIPI-DSI interface for video output and graphical user interfaces.
- Umsindo: Utilize the microphone input and speaker header for audio capture and playback functionalities.
5.4 SD Card Usage
Insert a TF card into the SDIO 3.0 TF card slot for expanded storage. This is useful for storing large multimedia files, logging data, or for applications requiring external memory.
6. Isondlo
To ensure the longevity and optimal performance of your ESP32-P4-POE-ETH development board, follow these maintenance guidelines:
- Ukuphatha: Always handle the board by its edges to avoid touching sensitive components, especially when powered.
- Ukuhlanza: Use a soft, dry brush or compressed air to remove dust. Avoid liquid cleaners.
- Isitoreji: Store the board in an anti-static bag in a cool, dry environment when not in use.
- Amandla: Always disconnect power before making or changing connections to the board.
7. Ukuxazulula izinkinga
If you encounter issues with your ESP32-P4-POE-ETH development board, consider the following troubleshooting steps:
- Awekho Amandla: Verify that the USB-C cable is securely connected and the power source is active. If using PoE, ensure the PoE module is correctly installed and the Ethernet source provides power.
- Programming Failure: Check USB cable connection. Ensure correct drivers are installed. Try pressing the BHUKU button during power-on or reset to enter download mode. Verify your development environment setup.
- I-Peripheral Ayitholakalanga: Double-check all wiring connections to GPIO headers, MIPI interfaces, and other ports. Ensure your firmware correctly initializes and communicates with the peripheral.
- Izinkinga Zokuxhumana Kwenethiwekhi: Confirm the Ethernet cable is properly connected. If using PoE, ensure the PoE module is functional. Verify network configuration in your firmware.
- Ukungazinzi Kwesistimu: Ensure your power supply is adequate. Check for short circuits or incorrect wiring of external components. Review your code for potential bugs or memory issues.
8. Imininingwane
Detailed technical specifications for the ESP32-P4-POE-ETH Development Board:
| Isici | Ukucaciswa |
|---|---|
| Ibhrendi | waveshare |
| Igama Lemodeli | ESP32-P4 POE ETH Dev Board |
| Inombolo Yemodeli | ESP32-P4-POE-ETH |
| Uhlobo lwe-Chipset | I-ESP32-P4 |
| Amaprosesa Ahambisanayo | I-ESP32-P4 |
| RAM Memory Technology | I-PSRAM |
| Amandla Okugcina Inkumbulo | 32 MB |
| Imemori ye-RAM Usayizi Ophezulu | 32 MB |
| Uhlobo Lwesixhumi Samandla Esikhulu | I-USB Type-C |
| Inani lamachweba | 9 (various interfaces) |
| Inani lamachweba e-Ethernet | 1 |
| Amadivayisi Ahambisanayo | Raspberry Pi Pico HATs, Custom-built devices |
| Umkhiqizi | Waveshare |
| I-UPC | 790885236853 |
| ASIN | B0FN4FX21T |
9. Ukusekela
For additional resources, detailed documentation, and technical support, please refer to the official Waveshare online development resources. If you encounter any problems or have questions not covered in this manual, do not hesitate to contact Waveshare customer support for assistance.
Online Development Resources: Waveshare Wiki (Note: This is a placeholder link, please refer to the actual product documentation for the correct URL.)