1. Ulwazi Olubalulekile Lokuphepha
Please read all instructions carefully before using the EVTSCAN Projection Clock. Keep this manual for future reference.
- Ungalibeki idivayisi emazingeni okushisa aphezulu, elangeni eliqondile, noma umswakama ophezulu.
- Avoid dropping or subjecting the clock to strong impacts.
- Ungazami ukuqaqa noma ukulungisa idivayisi ngokwakho. Xhumana nabasebenzi besevisi abaqeqeshiwe.
- Use only the specified power adapter (DC 5.0V, 1.2A) or appropriate batteries (2xAAA, not included).
- Gcina endaweni lapho izingane zingafinyeleleki khona.
2. Umkhiqizo Uphelileview
The EVTSCAN Projection Clock is a versatile digital alarm clock featuring a 3-inch backlit LCD screen that displays time, date, day of the week, temperature, and humidity. It includes a projection function to display time and temperature on a wall or ceiling, dual alarms with snooze, and a USB port for charging mobile phones.
Izici Eziyinhloko:
- 12/24-hour time format display.
- Date and day of the week display (7 languages for week).
- Temperature detection (-9℃ to +50℃) and humidity detection (20% to 95%).
- Projection function with 180-degree rotation for time and temperature.
- Dual alarm clocks with slowly increasing ivolumu.
- 5-minute snooze function.
- USB charging port for mobile devices.
- Adjustable backlight with 4 levels (high, medium, low, off).

Umfanekiso 2.1: Ngaphambili view of the EVTSCAN Projection Clock, showing the LCD display and projection lens.
3. Okuqukethwe Kwephakheji
Lapho ukhipha, sicela uqinisekise ukuthi zonke izinto ezibalwe ngezansi zikhona futhi zisesimweni esihle:
- 1 x EVTSCAN Projection Clock
- 1 x Ikhebula le-USB
- 1 x Incwadi Yomsebenzisi YesiNgisi
Note: 2xAAA batteries are required for battery power and are not included in the package.
4. Setha
4.1 Ukunika amandla Idivayisi
The EVTSCAN Projection Clock can be powered by either AAA batteries or via the included USB cable.
4.1.1 Ukufakwa kwebhethri
- Thola isembozo segumbi lebhethri ngemuva kwewashi.
- Slide open the cover.
- Faka amabhethri e-AAA amabili (2), uqinisekise i-polarity elungile (+/-).
- Vala ikhava yengxenye yebhethri ngokuphephile.
Note: When powered by batteries, the backlight will only light up for 8 seconds when activated to conserve power. The projection lamp will also light up for 8 seconds.
4.1.2 USB Power Connection
- Connect the small end of the provided USB cable to the DC 5.0V 1.2A input port on the back of the clock.
- Connect the larger end of the USB cable to a compatible USB power adapter (not included) or a powered USB port.
Note: When powered by USB, the backlight and projection lamp can remain continuously on, with adjustable brightness for the backlight.
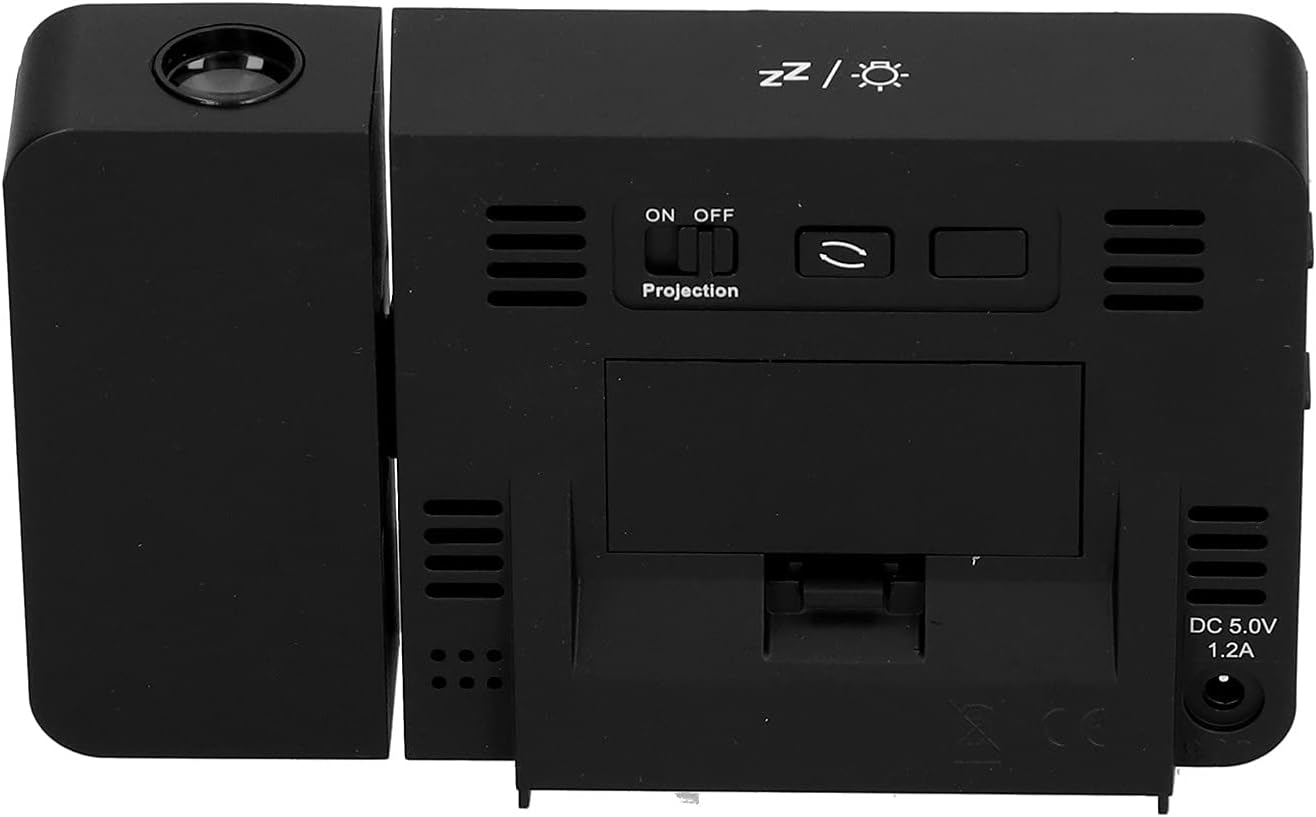
Umfanekiso 4.1: Ngemuva view of the clock, indicating the battery compartment and DC 5.0V 1.2A power input.
5. Iziqondiso Zokusebenza
5.1 Imisebenzi Yenkinobho
Familiarize yourself with the control buttons located on the front and sides of the clock:
- ISIKHATHI: Ingena kwimodi yokusetha isikhathi.
- I-ALMU: Ingena kwimodi yokusetha i-alamu.
- +: Increases values, switches 12/24HR format, adjusts backlight.
- -: Decreases values, switches temperature units (℃/℉).
- Projection ON/OFF Switch: Activates or deactivates the projection. (Located on the back/side)
- Alarm 1 ON/OFF Switch: Activates or deactivates Alarm 1. (Located on the side)
- Alarm 2 ON/OFF Switch: Activates or deactivates Alarm 2. (Located on the side)
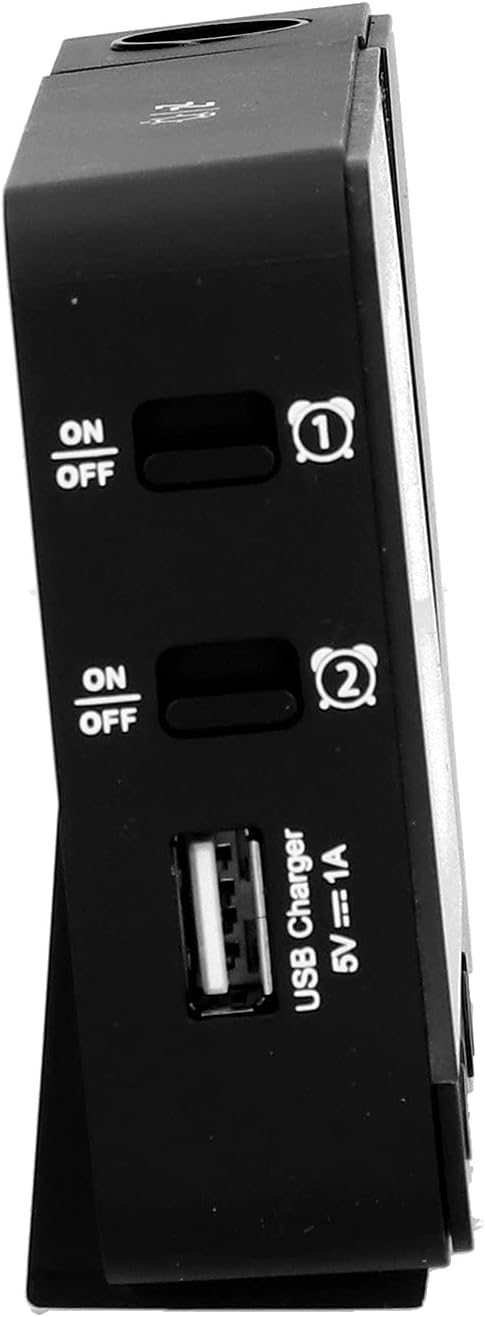
Umfanekiso 5.1: Side view showing Alarm 1 and Alarm 2 ON/OFF switches, and the USB charging port.
5.2 Ukubeka Isikhathi Nosuku
- Cindezela bese ubamba i ISIKHATHI button to enter time setting mode. The hour display will flash.
- Sebenzisa i- + or - izinkinobho ukulungisa ihora.
- Cindezela ISIKHATHI futhi ukuze uqinisekise ihora bese uhambisa ukulungiselelwa kweminithi. Lungisa nge + or -.
- Qhubeka ucindezela ISIKHATHI to cycle through setting year, month, and day. Adjust each with + or -.
- Ngemva kokusetha usuku, cindezela ISIKHATHI okokugcina ukuphuma kumodi yokusetha.
- Ukushintsha phakathi kwefomethi yamahora angu-12 kanye namahora angu-24, cindezela inkinobho + button during normal time display.
- To switch between Celsius (℃) and Fahrenheit (℉) for temperature, press the - button during normal time display.
5.3 Ukusetha Ama-alamu
Iwashi liqukethe ama-alamu amabili azimele (i-Alarm 1 kanye ne-Alarm 2).
- Cindezela bese ubamba i I-ALARM button to enter Alarm 1 setting mode. The Alarm 1 hour display will flash.
- Sebenzisa i- + or - izinkinobho zokulungisa ihora le-alamu.
- Cindezela I-ALARM again to confirm the hour and move to Alarm 1 minute setting. Adjust with + or -.
- Cindezela I-ALARM again to move to Alarm 2 hour setting, and repeat the process for Alarm 2.
- After setting Alarm 2 minutes, press I-ALARM okokugcina ukuphuma kumodi yokusetha.
- To activate or deactivate an alarm, use the corresponding I-alamu 1 KUVULIWE/KUVALIWE or I-alamu 2 KUVULIWE/KUVALIWE switch on the side of the clock. An alarm icon will appear on the display when active.
Umsebenzi we-5.3.1 Snuza
When an alarm sounds, press any button (except the alarm ON/OFF switch) to activate the 5-minute snooze function. The alarm will sound again after 5 minutes. To turn off the alarm completely, slide the corresponding alarm ON/OFF switch to OFF.
5.4 Umsebenzi Wokuphrojektha
The clock can project the time and temperature onto a wall or ceiling.
- Thola i- Ukuqagela KUVULIWE/KUVALIWE switch on the back of the clock. Slide it to ON to activate the projection.
- Adjust the angle of the projection arm (the part with the lens) to direct the projection as desired. The arm can rotate nearly 180 degrees.
- The projection will display the current time and temperature in a soft red color.

Umfanekiso 5.2: Side view showing the projection arm extended and ready for use.

Umfanekiso 5.3: The clock projecting time and temperature onto a wall in a bedroom setting.
5.5 Ukulungiswa Kwelambu Elingemuva
When the clock is powered by USB, the backlight can be adjusted to four levels: high, medium, low, or off. Repeatedly press the + button during normal time display to cycle through the brightness levels.
When powered by batteries, the backlight will illuminate for 8 seconds when any button is pressed, then turn off to conserve power.
5.6 Imbobo yokushaja ye-USB
The clock features a USB charging port (5V=1A) on its side. You can use this port to charge your mobile phone or other small electronic devices while the clock is connected to USB power.
Note: The USB charging port only functions when the clock is powered via the USB cable. It does not work when the clock is running on battery power.
6. Isondlo
6.1 Ukuhlanza
- Wipe the clock's surface with a soft, dry cloth.
- Do not use abrasive cleaners, solvents, or chemical sprays, as these may damage the finish or electronic components.
- Keep the projection lens clean for clear projection. Use a soft, lint-free cloth.
6.2 Ukushintshwa Kwebhethri
When the display becomes dim or the clock functions erratically while on battery power, it's time to replace the AAA batteries. Refer to Section 4.1.1 for battery installation instructions. Always replace both batteries at the same time with new ones.
7. Ukuxazulula izinkinga
| Inkinga | Imbangela Engenzeka | Isixazululo |
|---|---|---|
| Isibonisi sewashi asinalutho noma sifiphele. | No power, low batteries, or USB cable not connected. | Check battery installation and replace if necessary. Ensure USB cable is securely connected to a power source. |
| Projection is unclear or not visible. | Projection switch is OFF, lens is dirty, or projection distance is too far/close. | Ensure Projection switch is ON. Clean the projection lens. Adjust the clock's distance from the projection surface. |
| I-alamu ayizwakali. | Alarm is not set or is deactivated. | Verify alarm time is set correctly. Ensure the corresponding Alarm ON/OFF switch is in the ON position. |
| Imbobo yokushaja i-USB ayisebenzi. | Clock is running on battery power, or USB cable is not connected to a power source. | Ensure the clock is powered via the USB cable and connected to a functional power adapter. |
| Isikhathi/idethi engalungile. | Isikhathi/usuku alusethwanga kahle. | Bheka iSigaba 5.2 ukuze usethe kabusha isikhathi nosuku. |
8. Imininingwane
| Imodeli: | B0CLGDFCGX |
| Ibhrendi: | EVTSCAN |
| Okubalulekile: | I-ABS (Acrylonitrile Butadiene Styrene) |
| Ubukhulu bomkhiqizo: | Cishe. 13.5 x 8 x 2.5 cm (5.3 x 3.1 x 1.0 amayintshi) |
| Isisindo: | Cishe. 242g (8.5 oz) |
| Uhlobo lokubonisa: | I-LCD yedijithali ene-Backlight |
| Umthombo wamandla: | 2xAAA batteries (not included) or DC 5.0V 1.2A via USB cable |
| Okukhipha i-USB: | 5V=1A |
| Ibanga Lokutholwa Kwezinga Lokushisa: | -9℃ to +50℃ (1℃ resolution) |
| Ibanga Lokuthola Umswakama: | 20% to 95% (1% resolution) |
| Temperature/Humidity Calibration Time: | imizuzwana engu-30 |
| Amaleveli okukhanya kwangemuva: | 4 levels (High, Medium, Low, Off) when USB powered; 8s illumination when battery powered. |
| Ukuqagela Lamp: | Always on when USB powered; 8s illumination when battery powered. |

Umfanekiso 8.1: Product dimensions: 5.3 inches wide by 3.1 inches high.
9. Iwaranti kanye Nokusekela
EVTSCAN products are manufactured to high quality standards. For specific warranty information, please refer to the warranty card included with your purchase or contact your retailer.
If you encounter any issues or have questions regarding your EVTSCAN Projection Clock, please contact the seller or EVTSCAN customer support for assistance. Please have your model number (B0CLGDFCGX) ready when contacting support.
Ukuze uthole olunye usizo, ungavakashela i- EVTSCAN Store on Amazon.