
1. Isingeniso
Thank you for choosing the Galax Quasar GX600-WH Gaming PC Case. This manual provides essential information for the proper installation, operation, and maintenance of your new PC case. Please read this manual thoroughly before beginning installation to ensure optimal performance and safety.
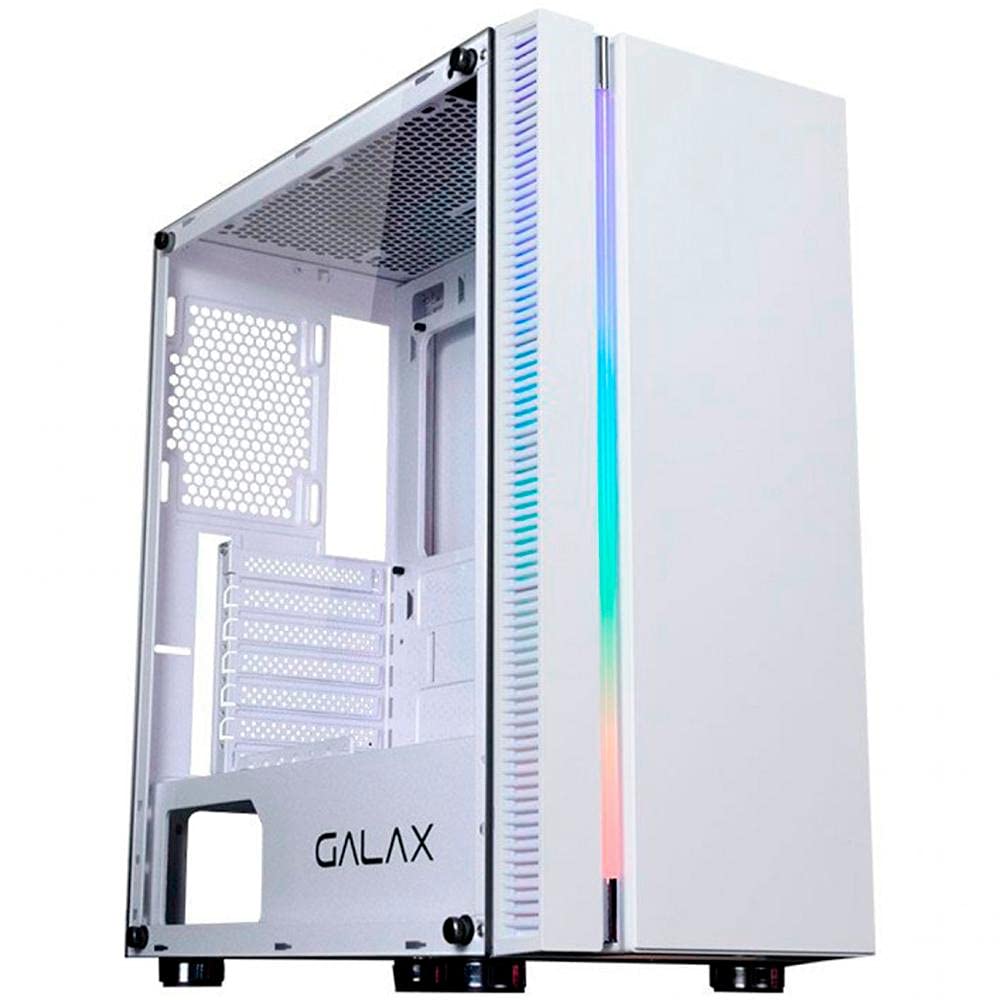
Umfanekiso 1.1: Ngaphambili view of the Galax Quasar GX600-WH Gaming PC Case, showcasing its integrated RGB lighting and minimalist design.
2. Ulwazi Lokuphepha
Sicela uqaphele izinyathelo zokuphepha ezilandelayo ukuze uvimbele umonakalo kumkhiqizo futhi uqinisekise ukuphepha komsebenzisi:
- Always disconnect the power supply from the wall outlet before installing or removing any components inside the PC case.
- Handle the tempered glass panel with care. It is fragile and can break if dropped or subjected to impact.
- Avoid placing the PC case in direct sunlight, near heat sources, or in areas with high humidity.
- Qinisekisa ukungena komoya ofanele ukuvimbela ukushisa ngokweqile. Ungawavimbi ama-airvents.
- Gcina izingxenye ezincane nezikulufu kude nezingane.
3. Okuqukethwe Kwephakheji
Qinisekisa ukuthi zonke izinto zikhona kuphakheji:
- Galax Quasar GX600-WH Mid Tower PC Case
- Ibhokisi Lezesekeli (izikulufo, izikhonkwane zokuma, izibopho zekhebula)
- Incwadi Yomsebenzisi (le dokhumenti)
Note: Fans are not included with this product and must be purchased separately.
4. Umkhiqizo Uphelileview
4.1. Izici Eziyinhloko
- Integrated RGB lighting on the front panel.
- Simple and minimalist design.
- Tempered glass side panel for component display.
- Front panel connectivity: 1x USB 3.0, 2x USB 2.0, 1x 3.5mm Audio, 1x 3.5mm Microphone.
- Rubber grommets for cable management.
- PSU shroud cutout to display power supply model.
- Magnetic dust filter on the top panel.
4.2. Ukuhlonza Ingxenye
Familiarize yourself with the main parts of the PC case:
- Front Panel with RGB Lighting
- Iphaneli ye-Tempered Glass Side
- Steel Side Panel (right side)
- Top Panel with Magnetic Dust Filter
- Rear Panel (I/O shield cutout, PCI-E slots)
- Front I/O Ports (USB, Audio)
- I-PSU Shroud
- Drive Bays (2.5" and 3.5")
Umfanekiso 4.1: Internal layout of the GX600-WH case, highlighting motherboard tray, drive bays, and cable routing options.
5. Ukusetha nokufakwa
Follow these steps to install your PC components:
5.1. Ukulungisa Icala
- Beka isikhwama endaweni eyisicaba, eqinile.
- Remove the tempered glass side panel by unscrewing the thumb screws and carefully pulling it away. Set it aside on a soft, non-abrasive surface.
- Remove the steel side panel by unscrewing the thumb screws and sliding it backward.
5.2. Ukufakwa kwe-Motherboard
- Install the I/O shield into the cutout on the rear panel of the case.
- Align your ATX, Micro-ATX, or Mini-ITX motherboard with the pre-installed standoffs. Additional standoffs may be required for certain motherboard sizes; install them as needed.
- Vikela i-motherboard ngezikulufo ezinikeziwe.
5.3. Ukufakwa Kweyunithi Yokunikezela Ngamandla (i-PSU).
- Position the PSU into the dedicated compartment at the bottom rear of the case.
- Ensure the PSU fan faces downwards (if the case has a bottom vent) or upwards (if no bottom vent).
- Vikela i-PSU ngezikulufo ngemuva kwekesi.
5.4. Ukufakwa Kwedrayivu Yesitoreji
- 2.5" Drives (SSDs): Locate the 2.5" drive mounts behind the motherboard tray or on the PSU shroud. Secure the SSDs using the provided screws.
- 3.5" Drives (HDDs): Locate the 3.5" drive cage. Slide the HDDs into the trays and secure them, typically with tool-less clips or screws.
5.5. Expansion Card (GPU, etc.) Installation
- Susa amakhava we-PCI-E slot adingekayo ngemuva kwekesi.
- Insert your expansion card (e.g., graphics card) into the appropriate PCI-E slot on the motherboard.
- Vikela ikhadi ngesikulufu.
5.6. Fan and Radiator Installation (Optional)
The GX600-WH supports various fan and radiator configurations:
- Phezulu: Up to 2x 120mm fans or a 240mm radiator.
- Ngaphambili: Up to 2x 120mm fans, 1x 140mm fan, or a 240mm radiator.
- Ngemuva: 1x 120mm fan or a 120mm radiator.
Install fans/radiators using the appropriate screws, ensuring correct airflow direction.
5.7. Ukuphathwa Kwentambo
Route all cables (PSU, data, front panel) through the rubber grommets and cable tie points behind the motherboard tray to maintain a clean interior and optimize airflow.
Umfanekiso 5.1: Illustration of the cable routing space behind the motherboard tray, demonstrating the use of rubber grommets for neat cable management.
6. Iziqondiso Zokusebenza
6.1. Ukuxhumanisa amaPheripheral
Once all internal components are installed and secured, replace both side panels. Connect your monitor, keyboard, mouse, and other peripherals to the appropriate ports on your motherboard's I/O shield and graphics card.
6.2. Ivula amandla
- Connect the power cable to your PSU and then to a wall outlet.
- Flip the power switch on the PSU to the "ON" position.
- Press the power button on the front panel of the GX600-WH case. The integrated RGB lighting should illuminate, and your system should begin to boot.
Umfanekiso 6.1: Okuningiliziwe view of the front I/O panel, showing the power button, USB 3.0, USB 2.0, and audio jacks.
7. Isondlo
Ukulungiswa njalo kusiza ukwandisa impilo yezingxenye ze-PC yakho futhi kuqinisekisa ukusebenza kahle.
- Izihlungi Zothuli: The top panel features a magnetic dust filter. Regularly remove and clean it with water or a soft brush. Ensure it is completely dry before reattaching.
- Ukuhlanzwa Kwangaphakathi: Periodically open the side panels and use compressed air to remove dust buildup from fans, heatsinks, and other components.
- Ukuhlanza Ingaphandle: Sula ingaphandle ngethafa elithambile, damp cloth. Avoid abrasive cleaners or solvents. For the tempered glass, use a glass cleaner and a microfiber cloth.
8. Ukuxazulula izinkinga
If you encounter issues with your PC case, refer to the following common problems and solutions:
| Inkinga | Imbangela Engenzeka | Isixazululo |
|---|---|---|
| I-PC ayivuli. | PSU switch off, power cables loose, front panel connector issue. | Ensure PSU switch is ON. Check all power connections (24-pin, 8-pin CPU, GPU). Verify front panel power button connector is correctly attached to the motherboard. |
| Front panel USB ports not working. | USB header cable not connected or incorrectly connected to motherboard. | Check the USB 3.0 and USB 2.0 header cables are securely connected to the correct pins on your motherboard. |
| Front panel audio jacks not working. | HD Audio cable not connected or incorrectly connected to motherboard. | Ensure the HD Audio cable is securely connected to the correct audio header on your motherboard. |
| Ukukhanyisa kwe-RGB akusebenzi. | RGB cable not connected to motherboard or controller. | Verify the RGB cable from the front panel is connected to a compatible RGB header on your motherboard or an external RGB controller. |
9. Imininingwane
| Isici | Imininingwane |
|---|---|
| Uhlobo Lwekesi | Mid Mid |
| Izinto zokwakha | SGCC Steel, Tempered Glass |
| Umbala | Emhlophe |
| Ukusekelwa Kwebhodi Lomama | I-ATX, i-Micro-ATX, i-Mini-ITX |
| Ukunwetshwa Slots | 7 Horizontal PCI-E |
| Drives Bays | 2x 2.5", 2x 3.5" |
| Izimbobo zangaphambili ze-I / O | 1x USB 3.0, 2x USB 2.0, 1x 3.5mm Audio, 1x 3.5mm Microphone |
| Ukusekelwa Kwabalandeli (Phezulu) | 2x120mm |
| Ukusekelwa Kwabalandeli (Ngaphambili) | 2x 120mm noma 1x 140mm |
| Ukusekelwa Kwabalandeli (Emuva) | 1x120mm |
| Ukusekelwa kwe-Radiator (Phezulu) | Kufika ku-240mm |
| Ukusekelwa kwe-Radiator (Ngaphambili) | Kufika ku-240mm |
| Ukusekelwa kweRadiator (Emuva) | 120 mm |
| Ubude be-GPU obukhulu | 345 mm |
| I-Max CPU Cooler Height | 160 mm |
| Ubukhulu (L x W x H) | 474mm x 257mm x 488mm |
| Isisindo sento | 6.25 kg |
Umfanekiso 9.1: Technical drawing illustrating the dimensions of the Galax Quasar GX600-WH case.
10. Iwaranti kanye Nokusekela
The Galax Quasar GX600-WH PC Case comes with a Iwaranti yezinyanga eziyi-12 kusukela ngedethi yokuthenga. Lesi siqinisekiso sifaka amaphutha okukhiqiza kanye namaphutha wezinto ezibonakalayo ngaphansi kokusetshenziswa okuvamile.
Iwaranti ayibandakanyi:
- Damage caused by improper installation, accident, abuse, misuse, natural disaster, or unauthorized modification.
- Cosmetic damage, including but not limited to scratches, dents, and broken plastic on ports, that does not affect functionality.
- Ukuguga okujwayelekile.
For technical support or warranty claims, please contact your local Galax distributor or retailer with your proof of purchase.