
1. Isingeniso
This manual provides detailed instructions for installing, configuring, and maintaining your GIGABYTE GA-B150M-D3H Micro ATX motherboard. The GA-B150M-D3H is designed to support 6th Generation Intel Core Processors and features Dual Channel DDR4 memory, PCIe Gen3 x4 M.2 connector, SATA Express, and 8-channel HD audio with Audio Noise Guard.
Please read this manual thoroughly before beginning installation to ensure proper setup and operation.
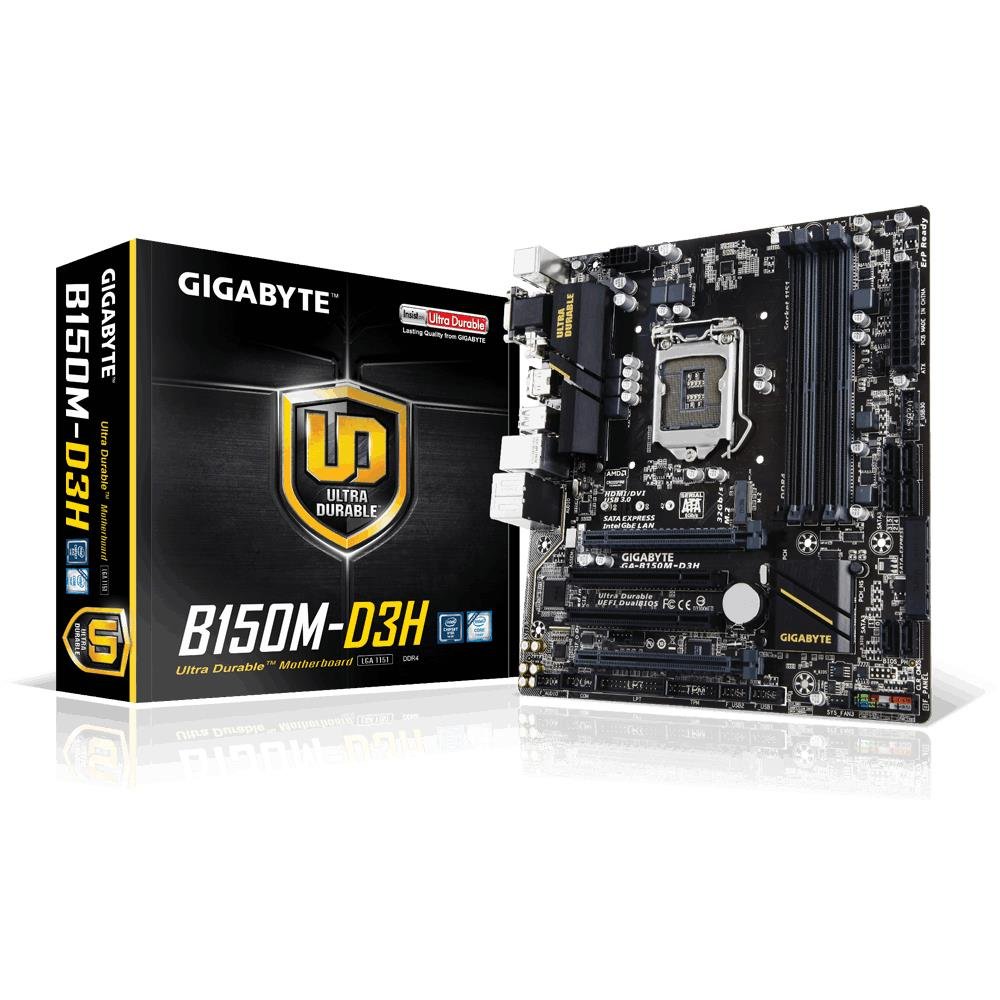
Image 1.1: GIGABYTE GA-B150M-D3H Micro ATX Motherboard. This image displays the overall layout of the motherboard, highlighting its compact Micro ATX form factor and various component slots.
2. Ulwazi Lokuphepha
Observe the following safety precautions to prevent damage to the motherboard and injury to yourself:
- Always disconnect the power cord from the wall outlet before touching any components.
- Gqoka ibhande lesihlakala elilwa nokungaguquguquki noma uthinte njalo into yensimbi egxilile ukuze ukhiphe ugesi ongaguquki.
- Phatha ibhodi lomama ngemiphetho yalo ukuze ugweme ukuthinta izingxenye ezibucayi.
- Gcina ibhodi lomama kude nomswakama kanye namazinga okushisa aphezulu.
- Ensure proper ventilation within the computer case to prevent overheating.
3. Okuqukethwe Kwephakheji
Qinisekisa ukuthi zonke izinto zikhona kuphakheji yakho yebhodi lomama:
- GIGABYTE GA-B150M-D3H Motherboard
- Imaniwali yosebenzisayo
- I-O Shield
- Izintambo ze-SATA
- Driver CD/DVD
Note: Contents may vary slightly depending on region or revision.
4. Isakhiwo Sebhodi Lomama
Familiarize yourself with the various components and connectors on the GA-B150M-D3H motherboard.
Image 4.1: GIGABYTE GA-B150M-D3H Motherboard Layout. This image provides a visual reference for the location of key components such as the CPU socket, DIMM slots, PCIe slots, SATA ports, and M.2 connector.
Izingxenye Ezibalulekile:
- Isokhethi ye-CPU ye-LGA 1151: For 6th Generation Intel Core Processors.
- DDR4 DIMM Slots (4): Supports Dual Channel DDR4 memory up to 2133 MHz.
- Izikhala ze-PCIe: Includes PCIe Gen3 x16 for graphics cards and PCIe x1 slots for expansion.
- M.2 Connector: Supports PCIe NVMe & SATA SSDs with up to 32Gb/s data transfer.
- SATA Express Connector: For up to 16Gb/s data transfer.
- Amachweba e-SATA 6Gb/s: Ukuxhumanisa amadivayisi esitoreji se-SATA esivamile.
- Isixhumi Samandla se-ATX esinezikhonkwane ezingu-24: Ukufakwa kwamandla okuyinhloko.
- 8-Pin ATX 12V Power Connector: CPU power input.
- Izihloko Zephaneli Engaphambili: For power button, reset button, LED indicators, and USB ports.
- Izixhumi Zomsindo: 8-channel HD Audio with high quality capacitors and Audio Noise Guard.
5. Ukusetha nokufakwa
Landela lezi zinyathelo ukuze ufake kahle ibhodi lakho lomama kanye nezingxenye zalo.
5.1. Ukufaka i-CPU
- Locate the LGA 1151 CPU socket.
- Vula i-lever yesokhethi ye-CPU bese uphakamisa ipuleti lomthwalo.
- Lungisa i-CPU nesokhethi ngokucophelela, uqinisekise ukuthi unxantathu wegolide ku-CPU ufana nonxantathu osesokhethini. Ungaphoqi i-CPU ukuthi ingene kusokhethini.
- Lower the load plate and secure it with the lever.
5.2. Ukufaka i-CPU Cooler
Refer to your CPU cooler's instruction manual for specific installation steps. Ensure thermal paste is applied correctly between the CPU and cooler base.
5.3. Ukufaka Imemori (i-RAM)
- Vula iziqeshana kuzo zombili iziphetho zezikhala ze-DDR4 DIMM.
- Hlanganisa i-memory module ne-slot, uqinisekise ukuthi i-notch ku-module ifana ne-key e-slot.
- Cindezela phansi ngokuqinile kuzo zombili iziphetho zemojuli yememori kuze kube iziqeshana zingena endaweni.
- For dual-channel performance, install memory modules in matching colored slots (e.g., DIMM1 and DIMM2).
5.4. Installing Expansion Cards
- Susa i-bracket yensimbi kusuka endaweni oyifunayo ye-PCIe ebhokisini lekhompyutha yakho.
- Align the expansion card with the PCIe slot and press down firmly until it is seated correctly.
- Secure the card with a screw to the computer case.
5.5. Connecting Storage Devices
- Amadivayisi e-SATA: Connect one end of the SATA data cable to a SATA 6Gb/s port on the motherboard and the other end to your hard drive or SSD. Connect the SATA power cable from your power supply to the device.
- M.2 SSD: Faka i-M.2 SSD embobeni ye-M.2 nge-engeli, bese uyicindezela phansi kancane bese uyiqinisa ngesikulufu esinikeziwe.
- SATA Express: If using a SATA Express device, connect it to the designated SATA Express connector.
5.6. Connecting Front Panel Connectors
Connect the cables from your computer case's front panel (power button, reset button, HDD LED, power LED, front USB, front audio) to the corresponding headers on the motherboard. Refer to the motherboard layout diagram for exact locations and pin assignments.
5.7. Ukunikezwa Kwamandla Okuxhuma
- Connect the 24-pin ATX main power connector from your power supply to the 24-pin power socket on the motherboard.
- Connect the 8-pin ATX 12V CPU power connector to the 8-pin socket near the CPU.
- Qinisekisa ukuthi zonke izixhumanisi zikagesi ziphephile.
6. Iziqondiso Zokusebenza
6.1. First Boot
After assembling all components, connect your monitor, keyboard, and mouse. Power on the system. The system should display the GIGABYTE splash screen and then enter the BIOS/UEFI setup or attempt to boot from a connected storage device.
6.2. Ukusethwa kwe-BIOS/UEFI
Ukuze ufake ukusethwa kwe-BIOS/UEFI, cindezela inkinobho ethi DEL key repeatedly during the boot process when the GIGABYTE logo appears. Here you can configure system settings, boot order, and monitor hardware status. The GA-B150M-D3H features GIGABYTE UEFI Dual BIOS for enhanced reliability.
6.3. Ukufakwa komshayeli
After installing your operating system, install the necessary drivers for the motherboard components. These can be found on the included driver CD/DVD or downloaded from the official GIGABYTE website. Key drivers include chipset, audio (Realtek ALC892 codec), LAN, and any integrated graphics drivers.
6.4. Ukufakwa Kwesistimu Esebenzayo
Insert your operating system installation media (USB drive or DVD) and configure the boot order in the BIOS/UEFI to boot from it. Follow the on-screen instructions to install your preferred operating system (e.g., Windows 8.1, Windows 10).
7. Isondlo
7.1. Ukuhlanza
Regularly clean the interior of your computer case to prevent dust buildup, which can lead to overheating. Use compressed air to remove dust from fans, heatsinks, and motherboard components. Ensure the system is powered off and unplugged before cleaning.
7.2. Ukuvuselelwa kwe-BIOS
GIGABYTE periodically releases BIOS updates to improve system stability, compatibility, and performance. Visit the official GIGABYTE website for your motherboard model (GA-B150M-D3H) to check for the latest BIOS version and follow the provided instructions for updating. Exercise caution during BIOS updates, as an interruption can render the motherboard inoperable.
8. Ukuxazulula izinkinga
Lesi sigaba sikhuluma ngezinkinga ezivamile ongahlangabezana nazo.
8.1. Akukho Mandla / Uhlelo Olungavuli
- Check if the power supply is connected correctly to the motherboard (24-pin and 8-pin connectors).
- Qinisekisa ukuthi inkinobho yokunikezela ugesi isendaweni ethi ON.
- Verify that the front panel power button cable is correctly connected to the motherboard header.
- Hlola ukunikezwa kwamandla ngolunye uhlelo noma ngomshini wokuhlola ukunikezwa kwamandla.
8.2. Akukho okukhiphayo kokubonisa
- Ensure the monitor is connected to the correct graphics output (either integrated graphics on the motherboard or a dedicated graphics card).
- Setha kabusha ikhadi lezithombe namamojula ememori.
- Try booting with only one memory module installed.
- Hlola ukuthi imonitha ivuliwe yini bese usetha umthombo wokufaka ofanele.
8.3. Ukungazinzi Kwesistimu / Ukuphahlazeka
- Hlola amazinga okushisa e-CPU kanye ne-GPU ukuqinisekisa ukuthi angaphakathi kwemingcele yokusebenza ephephile.
- Qinisekisa ukuthi wonke abashayeli bafakiwe futhi basesimweni sakamuva.
- Sebenzisa amathuluzi okuxilonga inkumbulo ukuze uhlole i-RAM enephutha.
- Ensure the power supply provides sufficient and stable power to all components.
9. Imininingwane
Detailed technical specifications for the GIGABYTE GA-B150M-D3H motherboard:
| Isici | Ukucaciswa |
|---|---|
| Igama Lemodeli | I-GA-B150M-D3H |
| I-Form Factor | I-Micro ATX (24.4cm x 22.5cm) |
| CPU Socket | I-LGA 1151 |
| Amaprosesa Ahambisanayo | 6th Generation Intel Core Processors |
| I-chipset | I-Chipset ye-Intel B150 Express |
| Ubuchwepheshe Benkumbulo | I-DDR4 |
| Izikhala zememori | 4 x DDR4 DIMM sockets (Dual Channel) |
| Umthamo Omkhulu Wememori | 16 GB |
| Isivinini sewashi lememori | 2133 MHz |
| I-PCIe Slots | 1 x PCI Express x16, 1 x Total PCIe Ports |
| Izindawo Zokuxhumana Zesitoreji | PCIe Gen3 x4 M.2, SATA Express, SATA 6Gb/s |
| I-Codec yomsindo | Realtek ALC892 codec, 8-channel HD Audio |
| Izimbobo ze-USB | Total 8 USB Ports (including USB 2.0) |
| Isixhumi Samandla Esikhulu | I-ATX enamaphini angu-24 |
| I-CPU Power Connector | 8-Pin ATX 12V |
| Izici Eziyingqayizivele | GIGABYTE UEFI Dual BIOS, Audio Noise Guard with LED Trace Path Lighting, App Center (Easy Tune, Cloud Station) |
10. Iwaranti kanye Nokusekela
For warranty information, please refer to the warranty card included in your product package or visit the official GIGABYTE webindawo. Imigomo nemibandela yesiqiniseko ingahluka ngokwesifunda.
For technical support, driver downloads, BIOS updates, and further product information, please visit the GIGABYTE official support webindawo:
https://www.gigabyte.com/Support
When contacting support, please have your motherboard model (GA-B150M-D3H) and serial number ready.